RS4 Exhaust Flap Control
March 29, 2015 – 9:50 pmThe B7 RS4 comes with a neat feature, there are vacuum-controlled flaps in the exhaust that keep it quiet around town but can be opened when you’re enjoying the car on a back road for a little more power and to hear the V8 sing. They’re also open when the car first starts up, which is why it makes such a nice noise when you start it up!
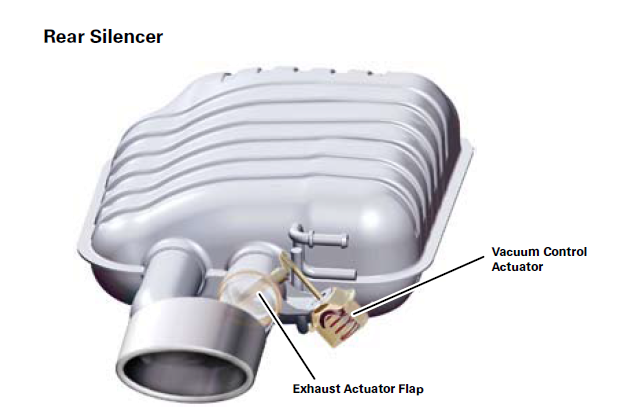
The only problem with this system is that to open the exhaust flaps you have to put the car in “S” mode, which also means that the accelerator curve is changed to be much more abrupt (or “direct”, as Audi would describe it). I don’t particularly enjoy the non-linear throttle response in S mode, and found the car much more controllable during autox events with it disabled. The other problem with this arrangement is that even in S mode, “After engine speed is increased, however, the exhaust flaps are closed again. This ensures that the vehicle meets the statutory noise emission limits.”.
That’s no fun, but as it happens there is a solution! The exhaust flaps are controlled by a vacuum solenoid behind the left rear wheel well, which controls whether vacuum from the engine is allowed to pull the flaps closed. The solenoid gets 12v from a connection shared with the leak detection pump, and when in “normal mode” the other pin is grounded via an ECU pin. This “opens” the solenoid and allows vacuum to close the flaps. (As an aside, this is why the flaps are open at startup, the solenoid vents when it doesn’t get 12v so the flaps stay open until there is enough vacuum from the running engine to pull them closed.)
So, armed with this knowledge we now know that we can add a switch to the connection between the ECU and the solenoid and control whether the flaps are open or closed! The rest of this post details how to install the switch and a 1k ohm resistor which will prevent the ECM from throwing a fault code when we disconnect the solenoid.
You will need:
- 1x toggle switch
- 1x 1k ohm 1/2 watt resistor
- 2x crimp connectors
- 1x wire tap
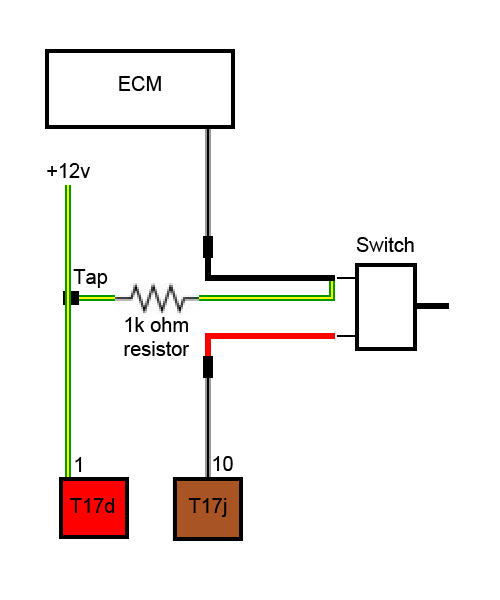
There are 2 wires we need to locate to complete the mod. The first is grey with a black stripe, and goes through pin 10 on the T17j brown connector in the connection block just underneath ECM 1 (the RS4 needed 2 ECMs to handle all the functions required), which is under the windshield cowling. The grey/black wire is the control signal from the ECM to the exhaust flap solenoid.
The second wire is green with a yellow stripe, and goes through pin 1 on the T17d red connector in the same connection block. This wire supplies 12v to the solenoid, and we will tap into it to fool the ECM into thinking the solenoid is always connected.
Here is a diagram of what we’re putting together, the switch cuts power to the solenoid to open the exhaust flaps while the 1k ohm resistor creates a circuit from the 12v source to the ECM pin to avoid creating an open circuit fault when the solenoid is disconnected.
Let’s get started!
Start by disconnecting the battery!
To remove the windshield cowling you’ll first need to remove the windshield wipers by popping the rubber caps at the base of the wiper arms, undoing the nuts and wiggling the arms off. Once the arms are off, remove the cowl trim by lifting it up and pulling gently toward you.
Next, remove the 3 small black metal clips that hold the windshield cowl trim in place and pull it free from where it clips along the bottom of the windshield. This will give you access to remove the T30 torx screws that hold down the ECM cover, and with that removed you’ll be left with something like this:
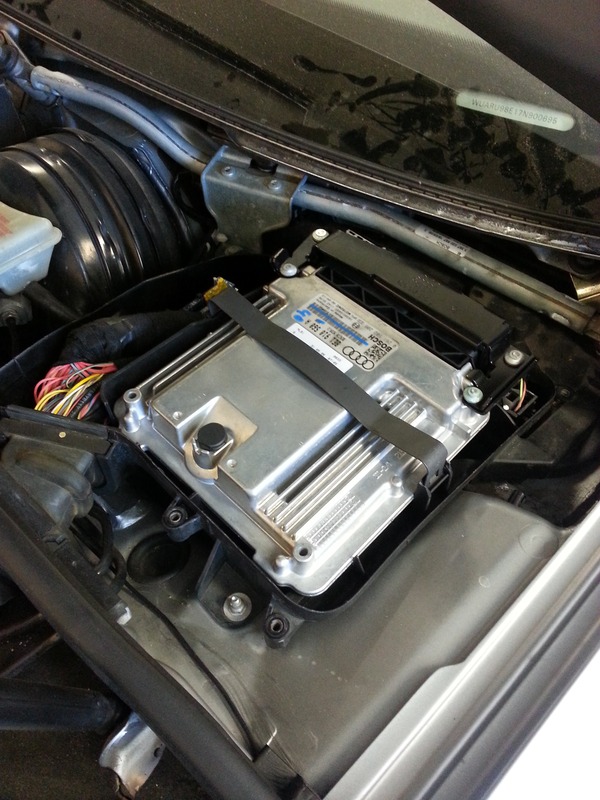
Use a flat screwdriver to pop the hold-down clip on the ECM, and pivot it out of the way to get access to the connector station underneath. At this point you’ll most likely want to remove the driver’s side lower dash panel (One 8mm bolt behind the fuse panel cover and 2 more at the bottom of the dash panel), so you can get access to the dash to fish wire through and to mount your switch.
Unplug the brown connector and locate the grey/black wire that goes to pin 10, this is the wire we need to cut. Here you can see it after I made the cut, I fished the cut end of the wire back through the harness label after I cut it to have more wire to work with in the next step.
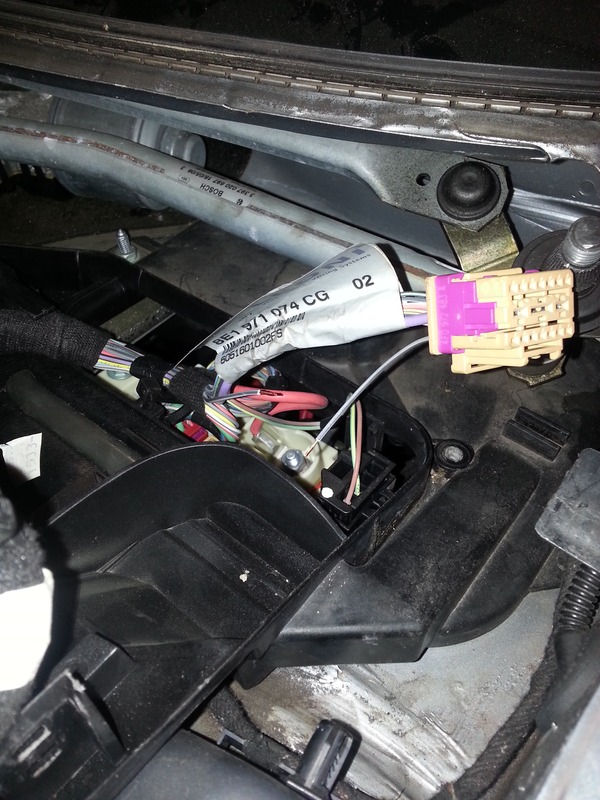
I used male/female crimp-on spade connectors to make the connections, so that the mod is easily reversible if desired. At this point connect each of the cut ends to a separate piece of wire (I used some 18 gauge red/black “zip wire”) so you can fish it back down into the dash. Note which side goes to the ECU, since this is the wire we’ll connect the resistor to in the next step.
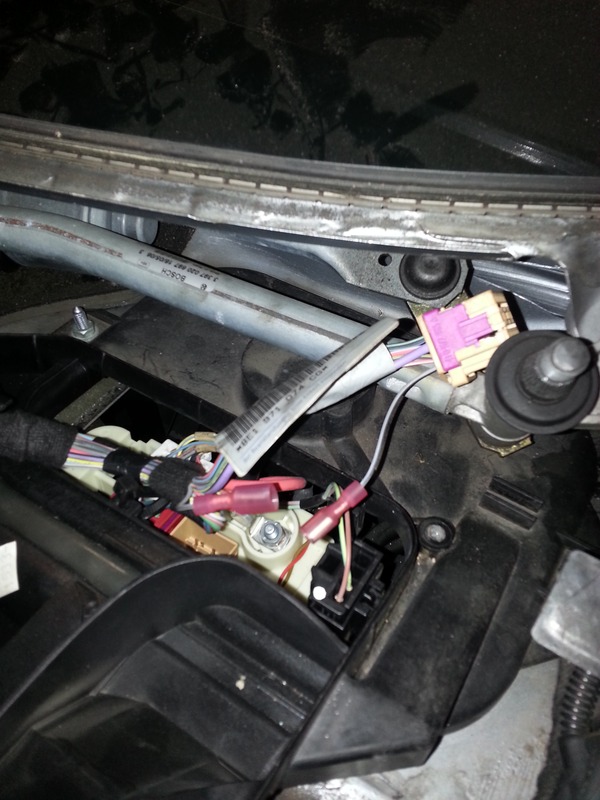
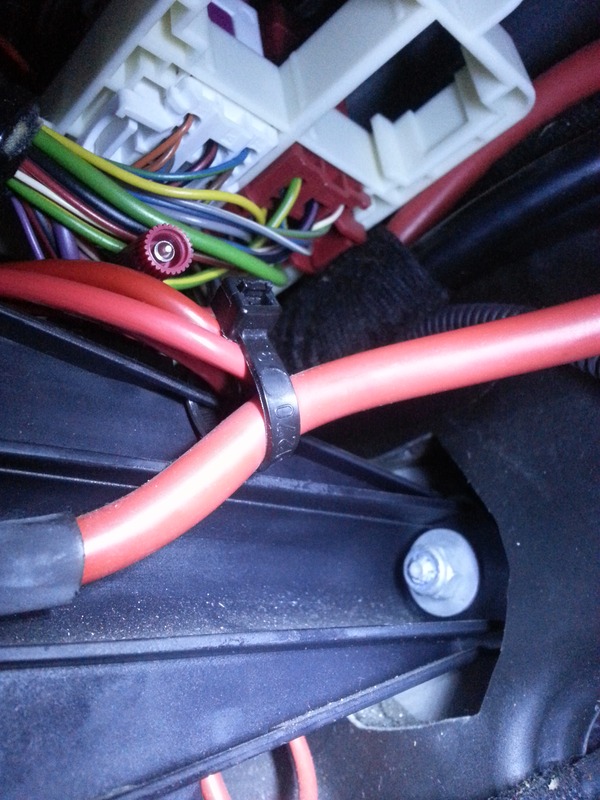
Locate the green/yellow wire on pin 1 of the red connector, then use a wire tap (I used a Posi-Tap) to tap into it and connect a wire to one leg of the 1k ohm resistor. I tapped into this wire from inside the car, but you can also tap in where it comes out of the top of the connector.
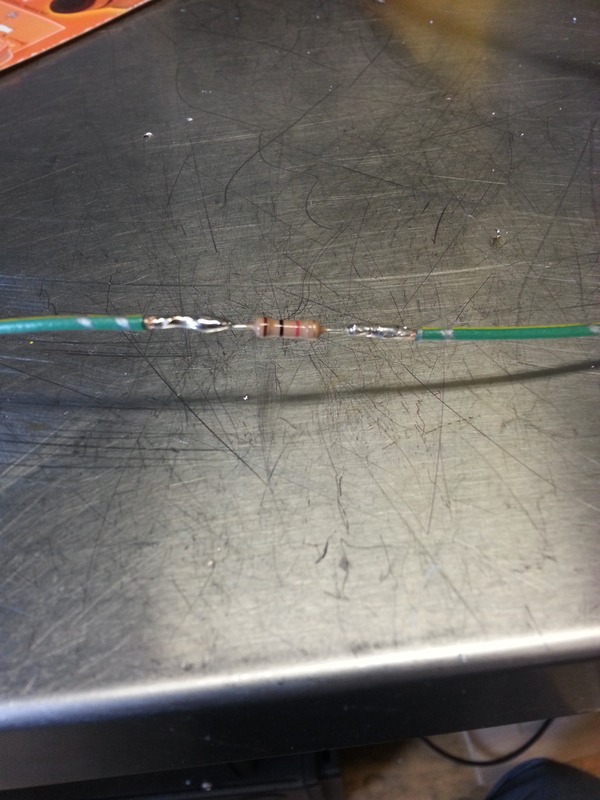
Here you can see the resistor soldered into a piece of matching green/yellow wire I happened to have. After soldering I covered the resistor with heat-shrink tubing.
Now, take the extension of the “upstream” grey/black wire coming from the ECU and the wire from the other leg of the resistor, and connect them both to 1 terminal on the switch. The extension of the “downstream” grey/black wire that goes to the solenoid should be connected to the 2nd terminal on the switch.
When the switch is On the exhaust flaps will work exactly as they did from the factory, when it is Off the connection to the solenoid is interrupted and the exhaust flaps will be open all the time. I wired mine to an “RS4” switch I picked up that fits into a factory location in the dash, but any switch will do. The solenoid only draws about 500ma when it’s operating, so a relay isn’t necessary as long as your switch can handle at least that current.
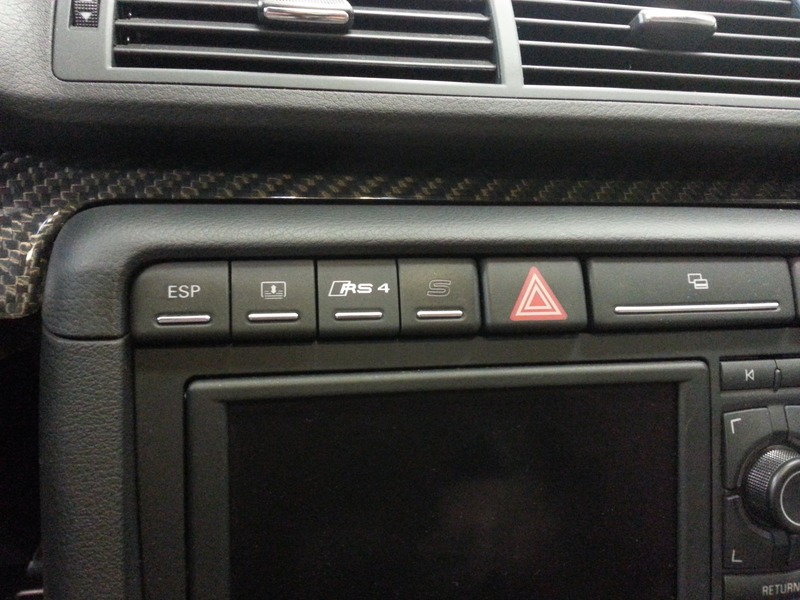
Put everything back together and enjoy!
6 Responses to “RS4 Exhaust Flap Control”
Hi Dan, nice write up here! Do you happen to have the part # for that RS4 switch, I can’t seem to find it with a quick google search. Also, does the switch reset on ignition (like the S button) or maintain state? Any visual indicator/light as to switch state?
cheers!
By Matt DeVillier on Feb 1, 2018
Hi Matt,
The RS4 switch is aftermarket, it came from carstyle4you.com and included a latching relay to convert the momentary switch into a push-on/push-off switch.
As for visual feedback, I designed and built a more complex circuit to light the RS4 logo at 1/2 brightness while enabled, while retaining the normal illumination function with the headlights on. I sold that one and haven’t gotten around to building another yet, it didn’t have a mode memory but did have a jumper to select the startup mode.
The relay that came with the carstyle4u switch has actually died, so I do intend to build another control module. If you’d be interested I was thinking about making a small batch of them.
The other option that interests me at the moment is to use a small microcontroller like the ESP8266 or ESP32, which would give some more options like connecting to the CAN bus and monitoring throttle position to control the flaps, etc.
By Dan on Feb 1, 2018
Dan,
Appreciate the info, and would certainly be interested in whatever you come up with, and/or discussing future revisions. If easier, drop me a line at first.last at gmail
-Matt
By Matt DeVillier on Feb 2, 2018
Hi Dan,
This is an excellent article, well written and with a comprehensive set of instructions. I am also looking for the same switch and would be interested in any future (hopefully short term) builds.
Is this the RS4 B7 – as the battery is normally in the boot (truck in the US).
Look forward to your response.
By Mark Heares on Aug 15, 2019
Mark, thanks for the kind words. This is indeed the B7 RS4 and the battery is in the boot/trunk.
By Dan on Aug 15, 2019
Hi Dan –
Brilliant write up — very grateful for this information and for the time you took to publish it!
carstyle4u doesn’t seem to be selling the aforementioned switch any longer — any idea of who else might sell the appropriate switch? I though it better to ask you than do it by trial and error!
Warmly,
Anand
By Anand on Jun 23, 2020